

Few components affect the overall integrity, function, and appearance of a construction project as much as concrete work. From foundations to finish work, concrete work quality will greatly determine the strength and usability of a finished project. When done properly, concrete should last a lifetime. Concrete projects vary depending upon soil composition, engineering specs, projected load requirements, and climate. However, let’s take a look at what goes into pouring concrete for a typical, everyday concrete project.
Pouring Concrete
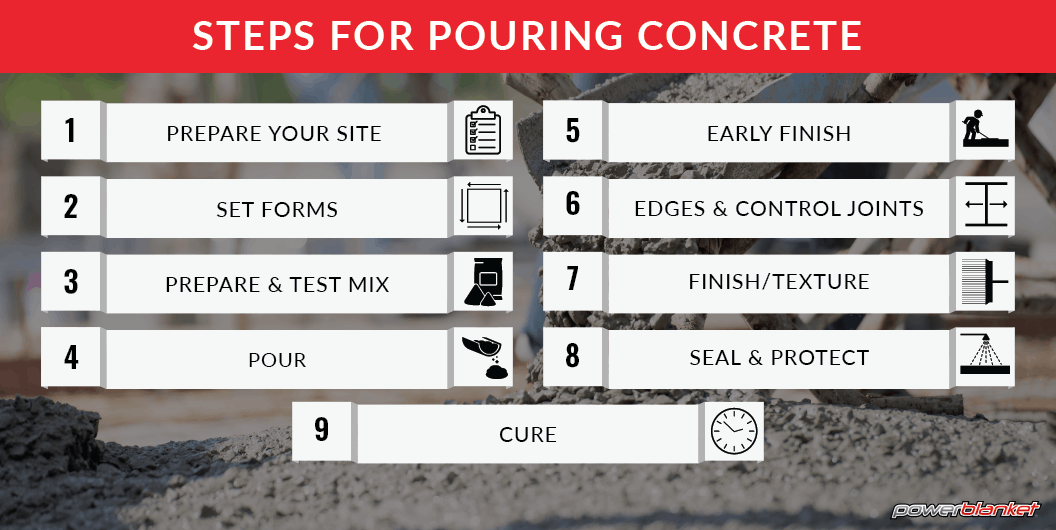
Prepare Your Site
Before you begin to pour, make sure your site is completely ready, especially if you are awaiting the arrival of a concrete delivery. Remove obstacles and unnecessary equipment to ensure the truck can maneuver around the pour site easily. Your pour site should be free of all landscaping or demolition debris.
Make sure you have the right number of hands on deck as well. Concrete work can move very quickly and, depending upon the weather, you have limited time from pour to set in which to round up more help. Prep protective equipment, screed boards, floats, finishing brooms, trowels, etc. so they are easily accessible when the concrete starts to pour.
SUB-GRADE
Sub-grade is the soil on top of which concrete is poured. Ensure the soil composition is compactable and will allow for adequate draining. Granular soils compact easily, have the highest load bearing strength and easily drain excess moisture. Soft top soils and clay based soils don’t compress easily, have lower compressive strength, and can heave when they retain moisture. If your soil is too soft or clay heavy, mix in some sub-grade fill before you compact. Sub-grade should be compacted down and leveled to remove high spots and fill in low spots. For extremely dry climates, lightly spraying down your sub-grade will make it much easier to compact.
SUB-BASE
Sub-base is comprised of additional materials, typically gravel, placed between the sub-grade and the concrete. Some slabs need a sub-base to act as a capillary break and prevent moisture from seeping from the subgrade into the slab. Sub-base can also increase the carrying load of your slab so it will stand up to heavier loads. Some slabs, like basement floors, will need an additional poly moisture barrier below the slab as well.
Forms
Once your site is prepared, it is time to set your desired concrete forms around your pour site. Wood, metal, or plastic concrete forms range from a few inches to many feet tall and are held in place by removable stakes. Some concrete projects require specialized forms, such as for stairs or retaining walls, so be sure you are using the correct forms for your pour. Know the dimensions of your projected slab well so you can make sure your forms are set correctly and at tight right angles.
SLOPE
Forms should be set to allow for some slope across the surface of the slab. The amount of slope you need will depend upon local construction codes, and where the slab will be poured. Slope prevents water from pooling up in the middle of your slab and helps it run-off properly. Drive and screw stakes around your forms every 3 feet and consider backfilling against the form to hold it in place. Cut off any stakes that protrude above your form because they can interfere with the screeding and finishing process.
REBAR
Once your forms are set, lay lengths of rebar in a grid across your pour site. The spacing will vary depending upon the size and projected load of the slab. There are apps and sites available to help you calculate how much rebar you will need. Tie rebar junctions together and install rebar chairs so the grid will be suspended in the center of your concrete and not just sitting on top of the sub-base. Do not use chairs if you need to use a wheelbarrow to move concrete across the pour site. If this is the case, you can simply lift the rebar grid slightly as you pour.
Prepare your mixture
Your ratio of cement/sand/aggregate/water will vary depending upon the compressive strength you need from your slab. Whether you are ordering a concrete delivery or mixing it yourself onsite, be sure to follow the mixing instructions and ratios recommended by the concrete manufacturer.
If you are mixing your concrete on-site, conducting a slump test will help you make sure your mix is not too fluid. Use a slump cone to see how much your mix settles when the cone is removed. High slump rates may mean your mixture is too fluid and can seep out through your forms. If the slump is too low, the concrete will be difficult to spread and finish properly. With some experience, you will know when a concrete mixture looks right and will not have to conduct a slump test for each pour.
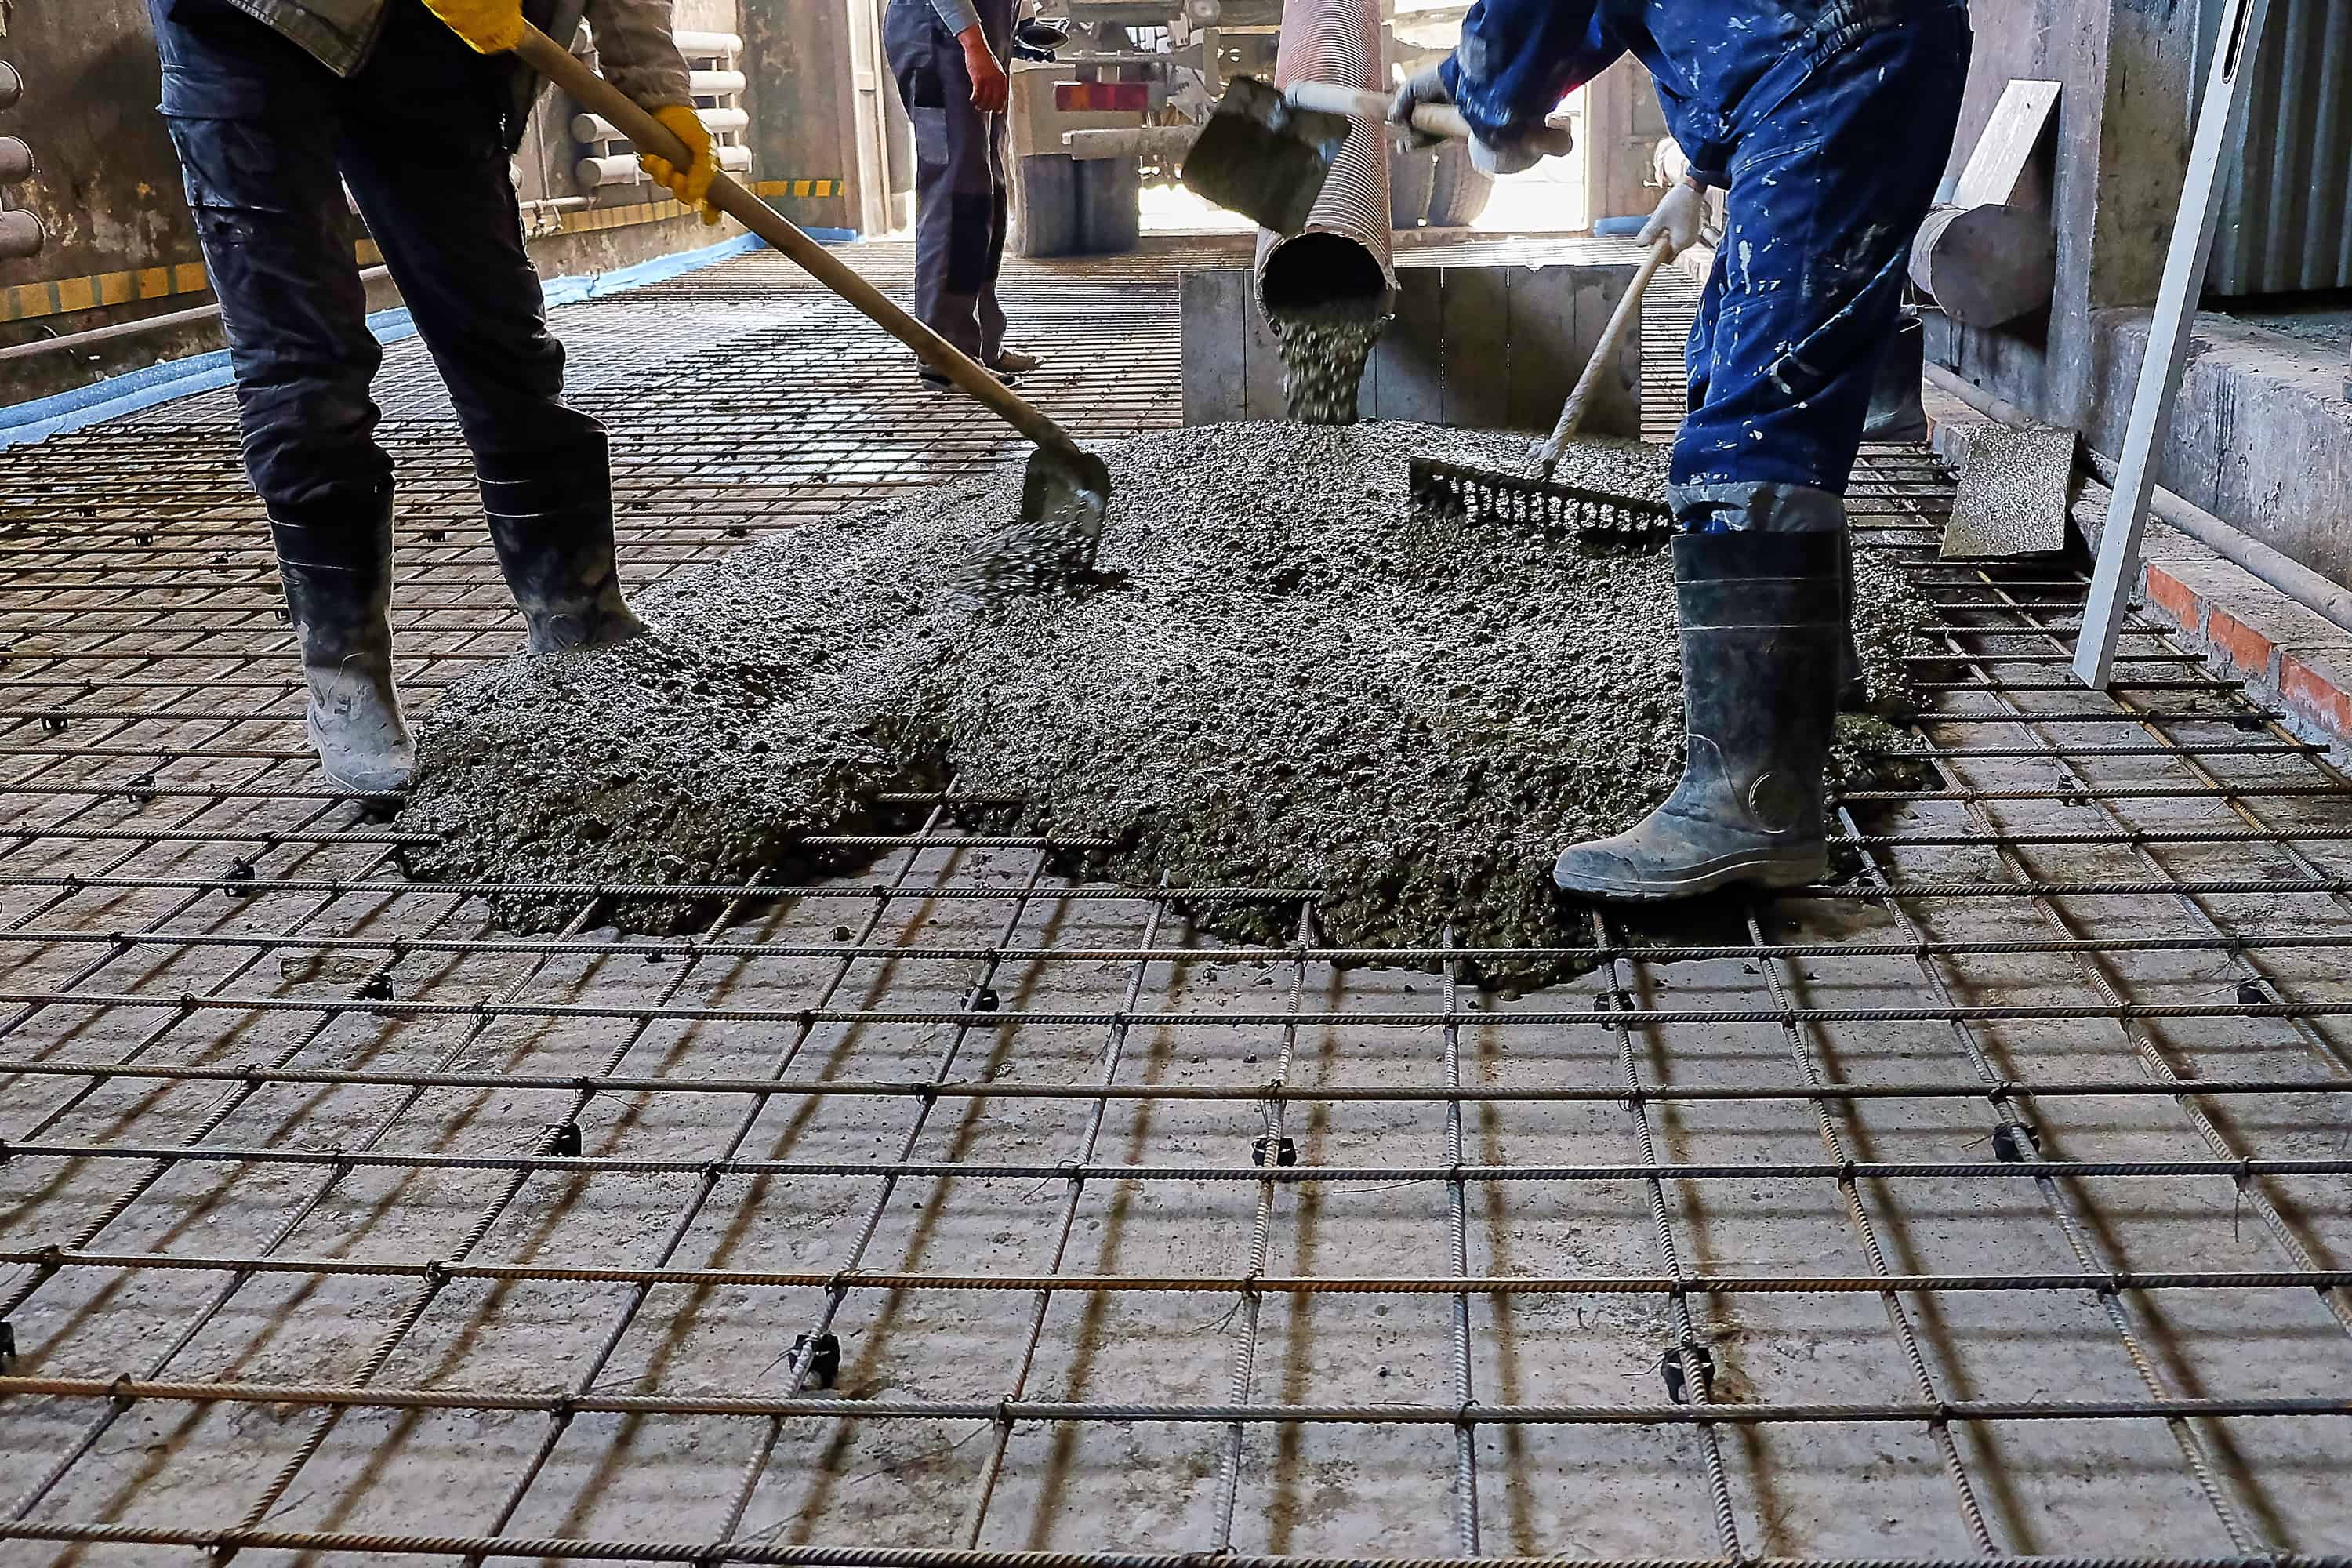
Time to Pour
During your pour, use concrete rakes to make sure there are no voids or air pockets. Make sure you work concrete into all the corners of your form and that your rebar grid is in the middle of the mix and not pushed down to the very bottom or visible at the top. Continue pouring until your forms are full to the top edge. For larger slabs, workers may get to work screeding in 1 section while concrete is still being poured in another.
Early Finish
Using screed boards, level and smooth concrete right away. Run your screed boards over the top of your forms to ensure you are following the slope you set up earlier. Screed until your slab is compact and consolidated. Once screeding is finished, begin using your desired floats to even out smaller depressions and rises in your concrete and create a smoother finish. Multiple people can be floating at once using either large bull floats for the center of the slab and smaller floats for the edges.
Control Joints & Edges
Once you have completed your early finish, cut control joints through your slab using a special trowel called a groover.
“Contraction/control joints are placed in concrete slabs to control random cracking. A fresh concrete mixture is a fluid, plastic mass that can be molded into virtually any shape, but as the material hardens there is a reduction in volume or shrinkage… contraction joints should be placed to produce panels that are as square as possible and never exceeding a length to width ratio of 1.5 to 1. Joints are commonly spaced at distances equal to 24 to 30 times the slab thickness.” – PCA (Cement.org)
Run an edging tool around the edge of the forms to give your concrete slab a clean fresh edge.
Finish
As your slab becomes partially set, it will be time to apply the desired finish. If there will be any future foot or vehicle traffic over your slab, texture will need to be applied so the surface is not too slick. There are many types of concrete finishes from stamping to brooms, so use the appropriate tool to apply the finish that you have prepared for.
Seal and Cure
After completing your final finish, apply your curing or sealing compound to reduce cracks, curling, and discoloration as it cures. The first 48 hours of your cure time are the most critical. Make sure nothing can fall on or into your slab during that time. Avoid walking on your slab for the first 3-4 days and do not move heavy loads or vehicles over your slab for the first 7-10 days. Remember that concrete reaches 70% of its final cure strength in 7 days but will take about a month to cure completely.
Powerblanket Winter Concrete Solutions
Putting concrete work on hold during the winter can create costly delays. Good news! Winter concrete work is entirely possible if you take precautions at certain steps of the process. Click here to learn more about pouring concrete during the winter. Powerblanket specializes in winter construction solutions. Our ground thaw blankets and concrete curing blankets are the perfect cure for your cold weather concrete needs. Contact us at 855.278.8908 or [email protected] to find the perfect concrete solutions for you and your operation.
Frequently Asked Questions
Can I pour concrete yourself?
Yes, you can pour concrete yourself, but it's advisable to have at least one or two friends help, especially if it's your first time, to ensure the process is manageable and efficient.
How much does it cost to pour 12x12 concrete?
The cost to pour a 12-by-12 concrete slab typically ranges from $796 to $1,476, depending on local material and labor costs.
Can I just pour concrete over dirt?
No, you should not pour concrete directly over dirt; instead, compact the soil and add a stable base of crushed stone or gravel to prevent cracks and settling.
Is it cheaper to pour your own concrete?
Pouring your own concrete can be cheaper if you have the necessary equipment and materials, but for small projects or without the right resources, it might be more cost-effective to have it delivered.
Cure your concrete faster and better in cold weather conditions with Powerblanket.
