
Roof flashing is unappreciated and goes unnoticed… until someone neglects to include it. Recently, a crew installed skylights on a flat roof but forgot to install the flashing. After the first rain, the living room below turned into an indoor swimming pool, causing thousands in water damage. The roofing company had to pay for the family’s hotel stay for almost two months and replace all their furniture!
If you are unfamiliar with this critical roofing product, you are about to learn what it is, how it works, installation tips, and why you should never skimp on roof flashing.
What is Roof Flashing And Why Is It Important?
Roof flashing is a thin, weatherproof sheet, typically metal or rubber. It installs around roof penetrations, such as chimneys, vents, skylights, and dormers, along the edges and roof valleys. Flashing is like a dam. Its purpose is to prevent water from seeping into the vulnerable areas of a roof.
Roof flashing is important for several reasons:
1. Waterproofing
Its primary function is to provide a waterproof barrier around roof penetrations like skylights, plumbing vents, and chimneys.
2. Leak Prevention
Flashing acts as a protective layer, sealing off vulnerable areas and preventing water from infiltrating the roof. It ensures that water moves away from potential entry points.
3. Longevity
Roof flashing extends the lifespan of a roof by keeping it dry. Preventing water damage helps maintain the roof system’s structural integrity and prevents rot, decay, and mold growth.
4. Energy Efficiency
Roof flashing also contributes to energy efficiency by creating an airtight seal around roof penetrations.
By ensuring proper installation and maintenance of roof flashing, homeowners and building owners can protect their investments, extend the lifespan of their roofs, and maintain a safe and dry environment within their property.
Flashing prevents water from seeping into your home and causing damage to the roof deck, rafters, and insulation. Never omit the flashing or take shortcuts when installing it. Here’s why…
The Consequences of Not Having Roof Flashing
If you don’t have proper flashing, your roof will leak badly. That’s for sure. A leaking roof means structural problems, mold growth, and interior damage. The moisture and rotting wood attract insects, causing further damage to the roof and walls, plus health risks.
Repairing a roof leak costs an average of $379 to $1,741. But that’s not all the cost. How about the home’s rugs, flooring, and furniture? Chances are your insurance won’t cover it, especially if it was due to faulty workmanship or materials. Did mold grow in the roof or attic due to the leak? You’ll probably be on the hook for that too. Most homeowner policies exclude mold and mildew remediation.
Flashing provides extra support and reinforcement to critical areas, such as corners and valleys. The absence of roof flashing can compromise your roof’s stability. Without this added protection, these areas are more susceptible to damage from wind uplift that can compromise the shingles.
Types of and Common Locations of Roof Flashing
There are different types of roof flashing, each designed for a specific location. Each type has a unique shape and installation method to address specific challenges posed by the roof’s structure:
| Type of Roof Flashing | Features |
| Continuous flashing | Also known as “run flashing,” it is installed where a vertical wall meets a sloped roof. It provides uninterrupted protection along the joints and transitions of the roof adding superior waterproofing and durability in areas prone to heavy rainfall or high winds. |
| Step Flashing | It butts up against vertical structures such as chimneys or walls and installs under the shingles. |
| Apron flashing | Like continuous flashing, L-shaped apron flashing installs at the base of a chimney or wall. It creates a waterproof barrier around dormers and chimneys. Apron flashing is usually metal, like aluminum or copper. |
| Valley Flashing | Installed in roof valleys, where two sloping roofs meet. It directs water away from the valley and prevents leaks. |
| Drip Edge Flashing | Aluminum drip edge flashing installs along the roof’s edges to direct water into the gutters, protecting the roof structure. |
| Vent Pipe Flashing | Vent pipe flashing surrounds pipes protruding through the roof. It creates a waterproof seal around the pipe to prevent leaks. |
| Chimney Flashing | Wraps around the base of the chimney to prevent water from entering the roof. |
| Skylight Flashing | Installed around skylights to prevent water infiltration. |
| Wall Flashing | Placed where the roof meets a vertical wall and prevents water from seeping under the roofing material and into the wall structure. |
Is Flashing on the Roof Necessary?
The simple answer is yes. It is critical to the entire structure’s integrity. Without flashing, even a new roof is susceptible to water damage. Flashing is a critical part of any roof’s waterproofing system, regardless of its design or the materials used. The potential damage caused by water intrusion far outweighs the cost of installing flashing.
How to Tell If You Need New Flashing
It is hard to tell if the flashing has worn out or become damaged if shingles cover it. Look for the following signs:
- Rust stains on your chimney’s firebox
- The flashing looked detached from the wall or chimney
- Water stains on ceilings and walls
- Water leakage in your attic, access space, or top-floor ceiling
- Corrosion/rust or holes on the actual flashing sheets
If you see any of these signs, it’s time to call your roofing contractor for an inspection.
What is Another Name for Roof Flashing?
Roof flashing goes by several names, depending on its specific type and function. In some cases, roof flashing might be referred to by its material, such as “metal flashing” or “galvanized steel flashing.”
Some alternative words you can use include:
- Roofing flashing
- Flashing material
- Roofing membrane
- Roofing sealant
- Roofing weatherproofing
These synonyms can be used interchangeably with “roof flashing” to refer to the materials or techniques.
How Bulk Material Warmers Can Solve Your Winter Roofing Problems
Winter presents unique challenges for roofing. Cold temperatures can make roofing materials brittle and difficult to work with.
Bulk material warmers, such as the ones offered by Powerblanket, can effectively solve winter roofing problems. These warmers can keep roofing materials at the optimal temperature, preventing issues like improper curing and adhesion. They are pallet-sized heated storage that maintains temperatures between 100°F and 120°F (37.7°C to 48.8°C). They keep materials like roofing cement and asphalt shingles warm and pliable, which prevents brittleness and cracking. Bulk material warmers can keep pneumatic roof nailers warm and ready to work.
Go to “How roofers can use bulk material warmers” to see options and a video demonstration of a hot box solution for roofers.
Roofing Tips for Cold Weather
Roofing in cold weather requires extra precautions and special considerations to ensure a successful and durable installation. PPE like gloves, good work shoes, and fall protection are essential for roofers any time of year, especially if snow or ice is present.
When is it too cold to roof? If temperatures drop to 40°F (4°C) or below, it’s best not to install asphalt shingles. They have adhesives that require the sun’s heat to melt them. Also, there is a potential to void the manufacturer’s warranty if installed below 40°F. However, with precautions, you can install a roof in cold weather. Here are some tips to keep in mind:
- Plan for the weather: Keep an eye on the sky, check the weather forecast, and schedule your roofing project during milder temperatures.
- Use high-performance shingles – Two-layer laminated shingles can prevent “blow-through” problems with nail guns that can happen in colder weather.
- Add sealant – The shingle’s adhesive may not activate on cold days. Add sealant to hold them in place until warmer weather seals them down.
- Handle materials with care – Cold temperatures can make roofing materials brittle and prone to damage. Take extra care when handling materials to avoid breakage and ensure their integrity.
- Use a bulk material warmer – Keep your materials at summer temperatures inside a material warmer.
- Work in smaller sections: Divide the project into smaller sections to install materials before they cool down.
With careful planning and the right tools, it’s possible to complete roofing projects safely in cold weather.
For more details, visit our blog, Tips for Roofing in Winter.
Most Important Materials and Tools for Roofing
The most critical roofing materials are shingles and flashing. The shingles protect your roof from the elements, while the flashing prevents water from seeping into your home. Flat roofs use a rubber membrane, but its purpose is the same. Here is a list of the most essential items you need for a quality roofing job:
- Roofing shingles – Choose high-quality shingles for your specific roof type and climate. Characteristics to consider are durability, warranty, wind resistance, and aesthetic appeal.
- Underlayment – An underlayment acts as a secondary barrier against water infiltration. It lies between the roof deck and the shingles, providing added protection. Choose an underlayment compatible with your roofing materials and offers good waterproofing properties.
- Flashing material – As we’ve discussed, flashing is crucial for protecting vulnerable areas of the roof. Select the appropriate type of flashing for each location, such as step flashing for chimneys and continuous flashing where the roof meets a wall.
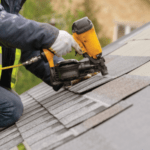
- Nail gun – Look for a nail gun that’s lightweight yet durable. Coil roofing nailers hold more nails than stick nailers but are heavier. Test to see which works best for you.
- Roofing nails – Use roofing nails for specific roofing materials, typically hot-dipped galvanized steel, 12 gauge or thicker.
- Roofing tools – Invest in the best quality roofing tools such as a roofing hammer, screwdriver, ladder, level, utility knife, air compressor, roofing shovel, and pry bar. Quality tools will make the job faster and easier.
The job may require additional materials like roofing cement, sealant, and insulation.
Special Considerations for Specific Areas of the Roof
Different roof areas require specific attention and consideration regarding flashing and installation.
The Chimney
Chimneys are one of the most critical roof areas for flashing. Proper chimney flashing is essential to prevent water infiltration down the side of the chimney. Step flashing installs in a staggered pattern along the sides of the chimney, providing a watertight seal. Counter flashing embeds into the chimney’s mortar joints as a barrier against water penetration.
Corner flashing
The corners of the roof are vulnerable to wind uplift and water infiltration. For proper protection, install corner flashing, which is metal flashing bent into an L-shape to fit the corner.
Flat roof
A common type of flashing used on flat roofs is called “membrane flashing,” a continuous strip of flashing material along the roof’s perimeter. Additionally, proper drainage systems, such as scuppers or roof drains, should be in place to prevent water pooling and potential leaks. Pay special attention to these areas and use the appropriate flashing techniques.
Why You Should Never Skimp On Roof Flashing
A roof is only as strong as its weakest point. If the whole roof needs replacement due to flashing system failure, the flashing repair cost becomes the cost of a new roof. For a commercial flat roof, that’s over $8,000, and about $7,000 for shingled roofs.
Always consider high-quality roof flashing and proper installation as an investment in the longevity and integrity of your roof and the building it protects.
Part of a proper installation is maintaining the integrity of the materials in cold weather. Temperature can be an issue in most parts of North America.
Explore Powerblanket Hot Boxes
When it comes to keeping roofing materials warm and ready to use, Powerblanket Hot Boxes are a game-changer. These innovative devices keep bulk materials at the optimal temperature, regardless of the weather conditions.
Powerblanket Hot Boxes are easy to use, energy-efficient, and highly reliable. They can accommodate palate sizes from 48x36x48 inches up to 48x48x66 inches. They are ideal for warming with roofing cement and shingles and ensure your materials are always ready to use.
The Powerblanket Hot Box is perfect for your roofing bulk material heating needs. Explore Hot Boxes.
Frequently Asked Questions
What is the flashing on the edges of my roof?
The flashing on the edges of your roof, known as drip edge flashing, is installed to direct water away from the fascia and soffit, preventing water infiltration and protecting the roof's structural integrity.
What are corner flashings?
Corner flashings are metal flashings bent into an L-shape to fit roof corners, providing essential protection against wind uplift and water infiltration at these vulnerable joints.
What is the flashing on the side of the roof?
The flashing on the side of the roof, often referred to as drip edge flashing, is crucial for preventing water from seeping under the shingles and causing structural damage to the house.
The Powerblanket Hot Box is the perfect solution for your bulk material heating needs.